Heike has granted me permission to translate their PSP - tutorials.
The original - PSP tutorial can you find on their homepage.
You need Supplies
1 Tube of choiceFTU Scrap "Natural" by Fantasy Dream Designz. Can you download on her Blog here.
Mask WSL_Mask328 by Chelle. Can you download here.
I use the beautiful tube by Jennifer Janesko. You must purchase a licence to use his art which can be done here.
Let's begin!
:::::::::::::::::::::::::::::::::::::::::::::::::::::::::::::::::::::::
1.
Open a new Raster Layer 800x800px - Flood fill with white
Open FD-Natural-Paper1 - copy and paste as new Layer
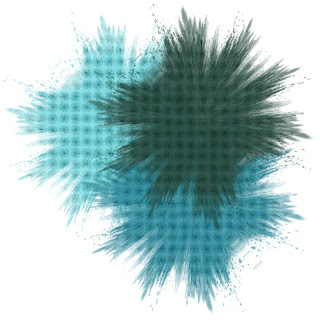
Apply the Mask WSL_Mask328
Layers - Merge - Merge Group
Apply a Drop Shadow 1 - -1 - 100 - 1,00 - black
Open FD-Natural-Paper2 - copy and paste as new Layer
Apply the Mask WSL_Mask328
Layers - Merge - Merge Group
Apply a Drop Shadow 1 - -1 - 100 - 1,00 - black
Merge - Merge Down - Resize to 90%
2.
Open FD-Natural-Element22 - copy and paste as new Layer
Move the Element22 a bit down, so it is centered
Open your Tube - copy and paste as new Layer - Resize if necessary
Move the Tube under the Frame
Apply a Drop Shadow 1 - -1 - 100 - 1,00 - black
Select the Select Tool - Draw a rectangular selection around the part, which is to be over the framework
see here
see here

Selections - Promote Selection to Layer
Selections - Select none
The convert Layer move to the top
The convert Layer move to the top
3.
Open FD-Natural-Element4 - resize to 50% - copy and paste as new Layer
Apply a Drop Shadow 1 - -1 - 100 - 1,00 - black
Move the Element4 down on the apex of the Heart
Open FD-Natural-Element5 - copy and paste as new Layer
Apply a Drop Shadow 1 - -1 - 100 - 1,00 - black
Move it right at the flower and move the layer below the first flower layer
Duplicate - Image - Mirror
the 3 Flower Layers summarized
So that from the three layers a layer shall
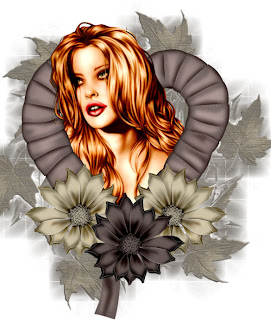
Your image should now look like this
So that from the three layers a layer shall
Your image should now look like this

4.
Open FD-Natural-Element25 - copy and paste as new Layer
Apply a Drop Shadow 1 - -1 - 100 - 1,00 - black
Image - Free Rotate - Right - 30,00
move it to the right edge of the Heart and move the layer under your Flowers Layer
Duplicate - Image - Mirror
Merge - Merge down
Open FD-Natural-Element38 - resize to 40% - copy and paste as new Layer
move it like on my picture

Apply a Drop Shadow 1 - -1 - 100 - 1,00 - black
5.
Open FD-Natural-Element55 - resize to 60% - copy and paste as new Layer
Apply a Drop Shadow 1 - -1 - 100 - 1,00 - black
Image - Free Rotate - Right - 30,00
Move to the left flower
Open FD-Natural-Element56 - resize to 60% - copy and paste as new Layer
Apply a Drop Shadow 1 - -1 - 100 - 1,00 - black
Image - Free Rotate - Left - 30,00
Move to the right flower
6.
Open FD-Natural-Element73 - resize to 50% - copy and paste as new Layer
Apply a Drop Shadow 1 - -1 - 100 - 1,00 - black
Move the butterfly on the bottom left corner of the element55 as to my image
If you want you can write your name or a text on the tag! Add your watermark and copyright information! Merge all and resize if needed!
Enjoy!
Enjoy!


